Load Testing on Web Servers using Apache Benchmark

ab

After working on many websites, I found one of my site getting too many traffic bringing down the site. I contacted the technical support who fixed the problem. I had never tested load on any of my site. So, I started studying load testing on web servers. This helped me to understand how many users can be handled by my website so that it can run smoothly.

I found a very light and strong linux tool called Apache Benchmark Tool that can test load on Web Servers. This can benchmark Apache, IIS and other web server with apache benchmarking tool called ab. There are also other open source tools that helps to test load on web servers.

[dfads params=’groups=-1′]

I executed following command on my linux terminal:

[code]

ab -c 1000 -n 1000 -t 60 -k http://ignou.ac.in

[/code]

Option -c : This option says there are 1000 concurrent users logged in on the Web Server.

Option -n : This option sends 1000 requests to the Web Server.

Option -t : This option says users will be logged in for 60 seconds.

Option -k : For Keep Alive On

I logged in to the web server and executed the following command to test the actual load.

[code]

top

[/code]

This command helped to track down the load average, CPU and Memory Utilization of the web server.

[dfads params=’groups=-1′]

How to redirect http requests to https on Debian Linux with Apache Web Server?

securing-apache5-590x277

[dfads params=’groups=-1′]

Do the following to redirect http requests to https running on Debian Linux with Apache Web Server.

File : /etc/apache2/ports.conf

[code]
NameVirtualHost *:80
Listen 80
[/code]

File : /etc/apache2/sites-availabe/default

[code]
<VirtualHost *:80>
ServerName www.example.com
Redirect / https://www.example.com/
</VirtualHost>

<VirtualHost *:443>
ServerName www.example.com
# … SSL configuration goes here
</VirtualHost>
[/code]

Restart Apache Webserver

[code]
/etc/init.d/apache2 restart
[/code]

[dfads params=’groups=-1′]

Installing and Configuring Commercial SSL on Debian Linux

SSL-Certificate-Secrity-H01CB360EBAB420000000000000004713

[dfads params=’groups=-1′]

Note: Please note that commercial SSL certificates require a unique IP address for SSL-enabled sites.

a. Enable SSL for Apache and make a directory named “ssl” inside “/etc/apache2/”

[code]
a2enmod ssl
mkdir /etc/apache2/ssl
[/code]

b. Create a Certificate Signing Request

[code]
cd /etc/apache2/ssl
openssl req -new -days 365 -nodes -keyout www.mydomain.com.key -out www.mydomain.com.csr
[/code]

The above command will create a certificate signing request (CSR) for the site which you’d like to use with SSL. Leave the challenge password blank.
Execute the following command to protect the key:

[code]
chmod 400 /etc/apache2/ssl/www.mydomain.com.key
[/code]

Files for your domain will be created in /etc/apache2/ssl. You may now submit the file ending in .csr to a commercial SSL provider for signing. You will receive a signed file after the CA signs the request. Save this file as /etc/apache2/ssl/www.mydomain.com.crt.
Execute the following command to protect the signed certificate:

[code]
chmod 400 /etc/apache2/ssl/www.mydomain.com.crt
[/code]

[dfads params=’groups=-1′]

c. Get the CA Root Certificate
You’ll need to get the root certificate for the CA that you paid to sign your certificate. You may obtain the root certs for various providers from these sites:
Verisign
Thawte
Globalsign
Comodo
For example, if we downloaded a root cert for Verisign, we would save it to /etc/apache2/ssl/verisign.cer.
d. Configure Apache to use the Signed SSL Certificate.
We’ll add an entry to /etc/apache2/ports.conf for the IP address you’ll be using to host your SSL-enabled site.
File excerpt:/etc/apache2/ports.conf

[code]
NameVirtualHost 12.34.56.78:443
Listen 443
[/code]

Replace the above IP address with your dedicated IP Address. Next, we edit the VirtualHost Configuration file i.e. /etc/apache2/sites-available/default in our case.

[code]
<Virtualhost 10.10.10.109:443>
SSLEngine On SSLCertificateFile /etc/apache2/ssl/www.mydomain.com.crt
SSLCertificateKeyFile /etc/apache2/ssl/www.mydomain.com.key
SSLCACertificateFile /etc/apache2/ssl/verisign.cer

ServerAdmin info@mydomain.com
ServerName www.mydomain.com
DocumentRoot /var/www/
ErrorLog /var/log/apache2/error.log
CustomLog /var/log/apache2/access.log combined
</Vritaulhost>
[/code]

NOTE: You can edit your existing Virtualhost Configuration file (Virtualhost *:80) by adding the above attributes within the Virtualhost tag.

e. Restart Apache:

[code]
/etc/init.d/apache2 restart
[/code]

f. Congratulations, you’ve installed a commercial SSL certificate! You can visit your site with SSL enabled. i.e. https://mydomain.com OR https://localhost/your_website/

[Source: https://library.linode.com/web-servers/apache/ssl-guides/debian-5-lenny]

[dfads params=’groups=-1′]

Solution to Url Encoded Slashes (%2F) Problem in Apache

[dfads params=’groups=-1′]

I was working on Drupal 6. I had to troubleshoot a site that has a problem in its link. The ugly URL looks like this: http://rcportblair.ignou.ac.in/admin/build/employee/search/result/none/0/none/%252F1

The last argument in the link i.e. %252F is a forward slash automatically added by the Drupal engine which was creating problem while generating result. There are many ways to handle these urls. One way is listed below:

<VirtualHost *:80>
    AllowEncodedSlashes On
</VirtualHost>

This directive may be set in server config file (e.g. httpd.conf OR /etc/apache2/sites-available/default) and may appear inside <VirtualHost> containers to affect certain websites. Using it in .htaccess files is not allowed.

[dfads params=’groups=-1′]

Clean URLs in CodeIgniter and Drupal for Debian based Dedicated Servers

[dfads params=’groups=-1′]

Initially, when my projects were in CodeIgniter I struggled to find out the solutions for Clean URLs. Now, I am working on Drupal CMS and the process for activating Clean URLs are similar as in CodeIgniter.

drupal&CodeIgniter

1. The first step is to add the following code in your .htaccess file.

<IfModule mod_rewrite.c>
RewriteEngine on

# Rewrite URLs of the form 'x' to the form 'index.php?q=x'.

RewriteCond %{REQUEST_FILENAME} !-f
RewriteCond %{REQUEST_FILENAME} !-d
RewriteRule ^(.*)$ project_dir/index.php?q=$1 [L,QSA]
</IfModule>

2. Next, for Debian Linux OS edit /etc/apache2/sites-available/default file and add the following script.

<Directory "/var/www/project_dir/">
RewriteEngine on
RewriteBase /
RewriteCond %{REQUEST_FILENAME} !-f
RewriteCond %{REQUEST_FILENAME} !-d
RewriteRule ^(.*)$ project_dir/index.php?q=$1 [L,QSA]
</Directory>

3. If you are using CodeIgniter, the above two steps are done but for Drupal sites, visit the following link from your Drupal CMS Admin: http://your_site/admin/settings/clean-urls. Select the Enabled radio button & click on save.

Congratulations, You have activated Clean URLs for your websites.

[dfads params=’groups=-1′]

Restrict SSH Access by IP Address on Linux

[dfads params=’groups=-1′]

Here is how to restrict SSH access to certain IP addresses on and off your home LAN.

Edit the /etc/hosts.allow file to include these lines, assuming your home LAN is on the 192.168.4.x nonrouting IP block, and your work address is on the routing 1.1.1.x
IP block: Remember to add the period on the end of each incomplete IP number.
If you have another complete IP address or range, add a space and that range on the end.

# allow ssh login from home LAN and work LAN
sshd,sshdfwd-X11: 192.168.4. 1.1.1.x.

Edit your /etc/hosts.deny file to include this line:
sshd,sshdfwd-X11:ALL
These lines refuse SSH connections from anyone not in the IP address blocks listed.

Log out and then try logging back in to test your configuration. Good luck!

[dfads params=’groups=-1′]

How to detect a DOS / DDOS Attack on your Linux Server?

[dfads params=’groups=-1′]

While researching through website traffic problems, the first thing that came in my mind is DoS / DDoS attacks. So, I started to study about it.

What is DoS / DDoS attack? 

(Wiki Answer) : In computing, a denial-of-service attack (DoS attack) or distributed denial-of-service attack (DDoS attack) is an attempt to make a machine or network resource unavailable to its intended users. Although the means to carry out, motives for, and targets of a DoS attack may vary, it generally consists of efforts to temporarily or indefinitely interrupt or suspend services of a host connected to the Internet.

How to check if your Linux server is under DDOS Attack?

Login to your Linux Server and type the following command:

netstat -anp |grep ‘tcp\|udp’ | awk ‘{print $5}’ | cut -d: -f1 | sort | uniq -c | sort –n

This command will show you the list of IP’s which have logged in is maximum number of connections to your server. It becomes more complex if the attacker use fewer connections with more number of attacking IP’s.

[dfads params=’groups=-1′]

We can check active connections to the server using the following command:

netstat -n | grep :80 |wc –l

The above command will show the active connections that are open to your server. The result may vary but if it shows connections more than 500, then you will be definitely having problems.

netstat -n | grep :80 | grep SYN |wc –l

If the result of the above command is 100 or above then you are having problems with sync attack.

Once you get an idea of the ip attacking your server, you can easily block it. Fire the following command to block specific IP:

route add ipaddress reject

Fire the following command to check whether that IP is blocked or not:

route -n |grep IPaddress

You can also block a IP with iptables on the server by using the following command.

iptables -A INPUT 1 -s IPADRESS -j DROP/REJECT

service iptables restart

service iptables save

After firing the above command, KILL all httpd connection and than restart httpd service by using  following command:

killall -KILL httpd/apache2

[dfads params=’groups=-1′]

[Updated 12-12-2013]

In order to delete the route entry, fire the following command.

ip route delete ipaddress

[Source : https://kb.hivelocity.net/how-to-check-if-your-linux-server-is-under-ddos-attack/]

How to stop/prevent drupal registration spam?

[dfads params=’groups=-1′]

I am a web developer at IGNOU. I have been maintaining IGNOU Website ignou.ac.in since August, 2013. Yesterday, my colleague found that there were number of users automatically registered and asked me to handle the issue.

I studied the issue and found that the users registered were spam having similar kind of email addresses. I explored the internet and found a solution.

Block the offending domains:

I went to the Access Rules section in the admin panel (admin/user/rules), and added a DENY rule for each of the domains. The rule configuration takes a wildcard, so I could simply enter %@http://pray.agencja-csk.pl.

I also found that access rules functionality has been removed from the Drupal 7 core. It is now provided by the User restrictions module.

[dfads params=’groups=-1′]

Embed your latest tweets on your website the API v1.1

[dfads params=’groups=-1′]

Procedure

Side note: There are many ways to connect to Twitter, but this post isn’t about how to make authenticated calls to the API. Here, we are just going to focus on the simple display of a timeline without authentication.

  1. Log into your twitter account
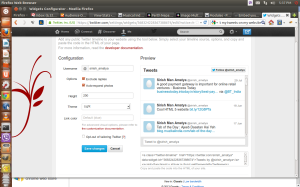
  2. Go to your widget management page using https://twitter.com/settings/widgets
  3. Create your widget choosing the timeline source of your choice (user, favs, list or search)
  4. Copy and paste the code into the HTML of your site.
  5. Change the settings you are able to change (which isn’t much) to your liking (read from Client Side Options and onwards on the embedded timelines page)

Example

A simple example with a status timeline limited to 5 tweets (data-tweet-limit=”5″), a transparent background, no header, no footer (data-chrome=”nofooter noheader transparent”), and the color of my choice for the links (data-link-color=”#1BB5E0″) and borders (data-border-color=”#B5DDE8″).


Screenshot from 2013-08-16 17:37:39

[dfads params=’groups=-1′]